Cube Cat Papercraft
The template that would not close, rebuilt: geometrically correct nets, textured with photos of the real cat, a 3D fold-and-assemble demo, and three A4 sheets ready to print or download as PDF.
Fold, then assemble
The nets lie on three A4 sheets. Move the slider or press play: each part is built one after another the way you would do it on the table: turn the print face down (the back shows the print through the paper), fold every glue tab up, fold the sides, close the box. Only then do the finished parts come together on the body. The model textures are the same pixels that are printed on the sheets.
Why the original could not be assembled
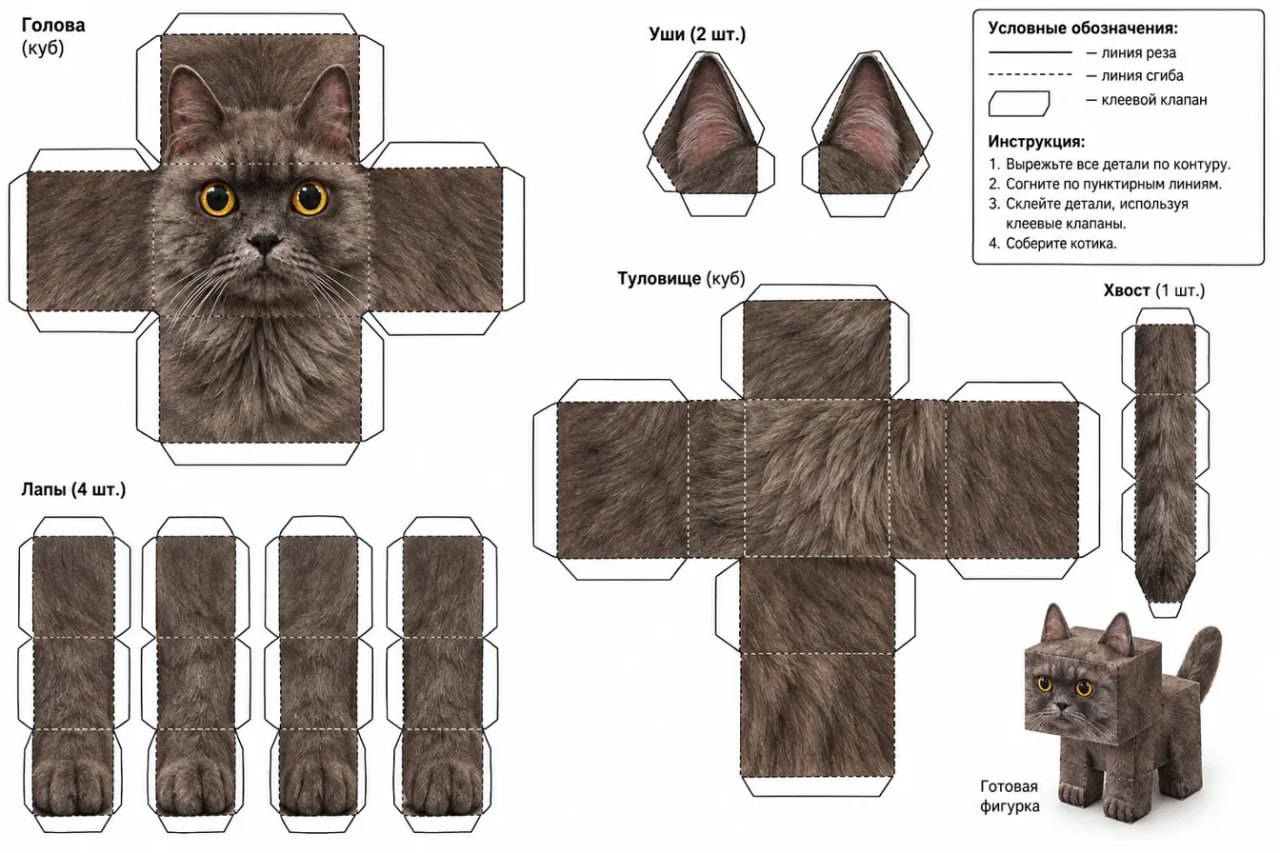
Panel sizes were measured on the 1280 × 853 px scan. Every problem below is geometric, not a folding mistake: the drawing itself does not describe closed boxes.
 1
2
3
4
5
6
1
2
3
4
5
6
- 1Head is labelled "cube" but drawn with rectanglesFront panel is 200 × 142 px (ratio 1.41), the side panels are 133 and 143 px wide, the top is 137 px tall and the bottom 131 px. No two edges that must meet are the same length.only 5 panels: the sixth (back) face is missing entirely
- 2Body net is not a netThe middle row has four panels of 129, 80, 55 and 243 px, the top panel is 99 px tall, the column below is 155, 96 and 123 px. Six panels, but no consistent width, height or length, so the box cannot close.finished-figure picture shows a box about 1.8 × longer than tall, which the net does not encode
- 3Two tabs on every seamTabs are drawn on almost every outer edge (14 on the head). A cube net has 12 edges, 5 are folds, so exactly 7 tabs are needed, one per seam. Two tabs on one seam collide and push the faces apart.
- 4Legs are 3-panel stripsA strip of three panels 80 px wide can wrap only three sides. There is no fourth side, no top and no bottom, and the paw print sits on a side panel instead of the bottom.
- 5Ears twice, and unspecifiedEars are printed on the head's top panel and supplied again as loose triangles with no fold line and a tab on one side only.
- 6Tail is a 3-panel strip with no closureSame problem as the legs: 61 × 279 px strip, three panels, nothing to glue it shut, and no way to attach it to the body.no scale anywhere on the sheet, so parts cannot even be resized to match each other
The corrected model
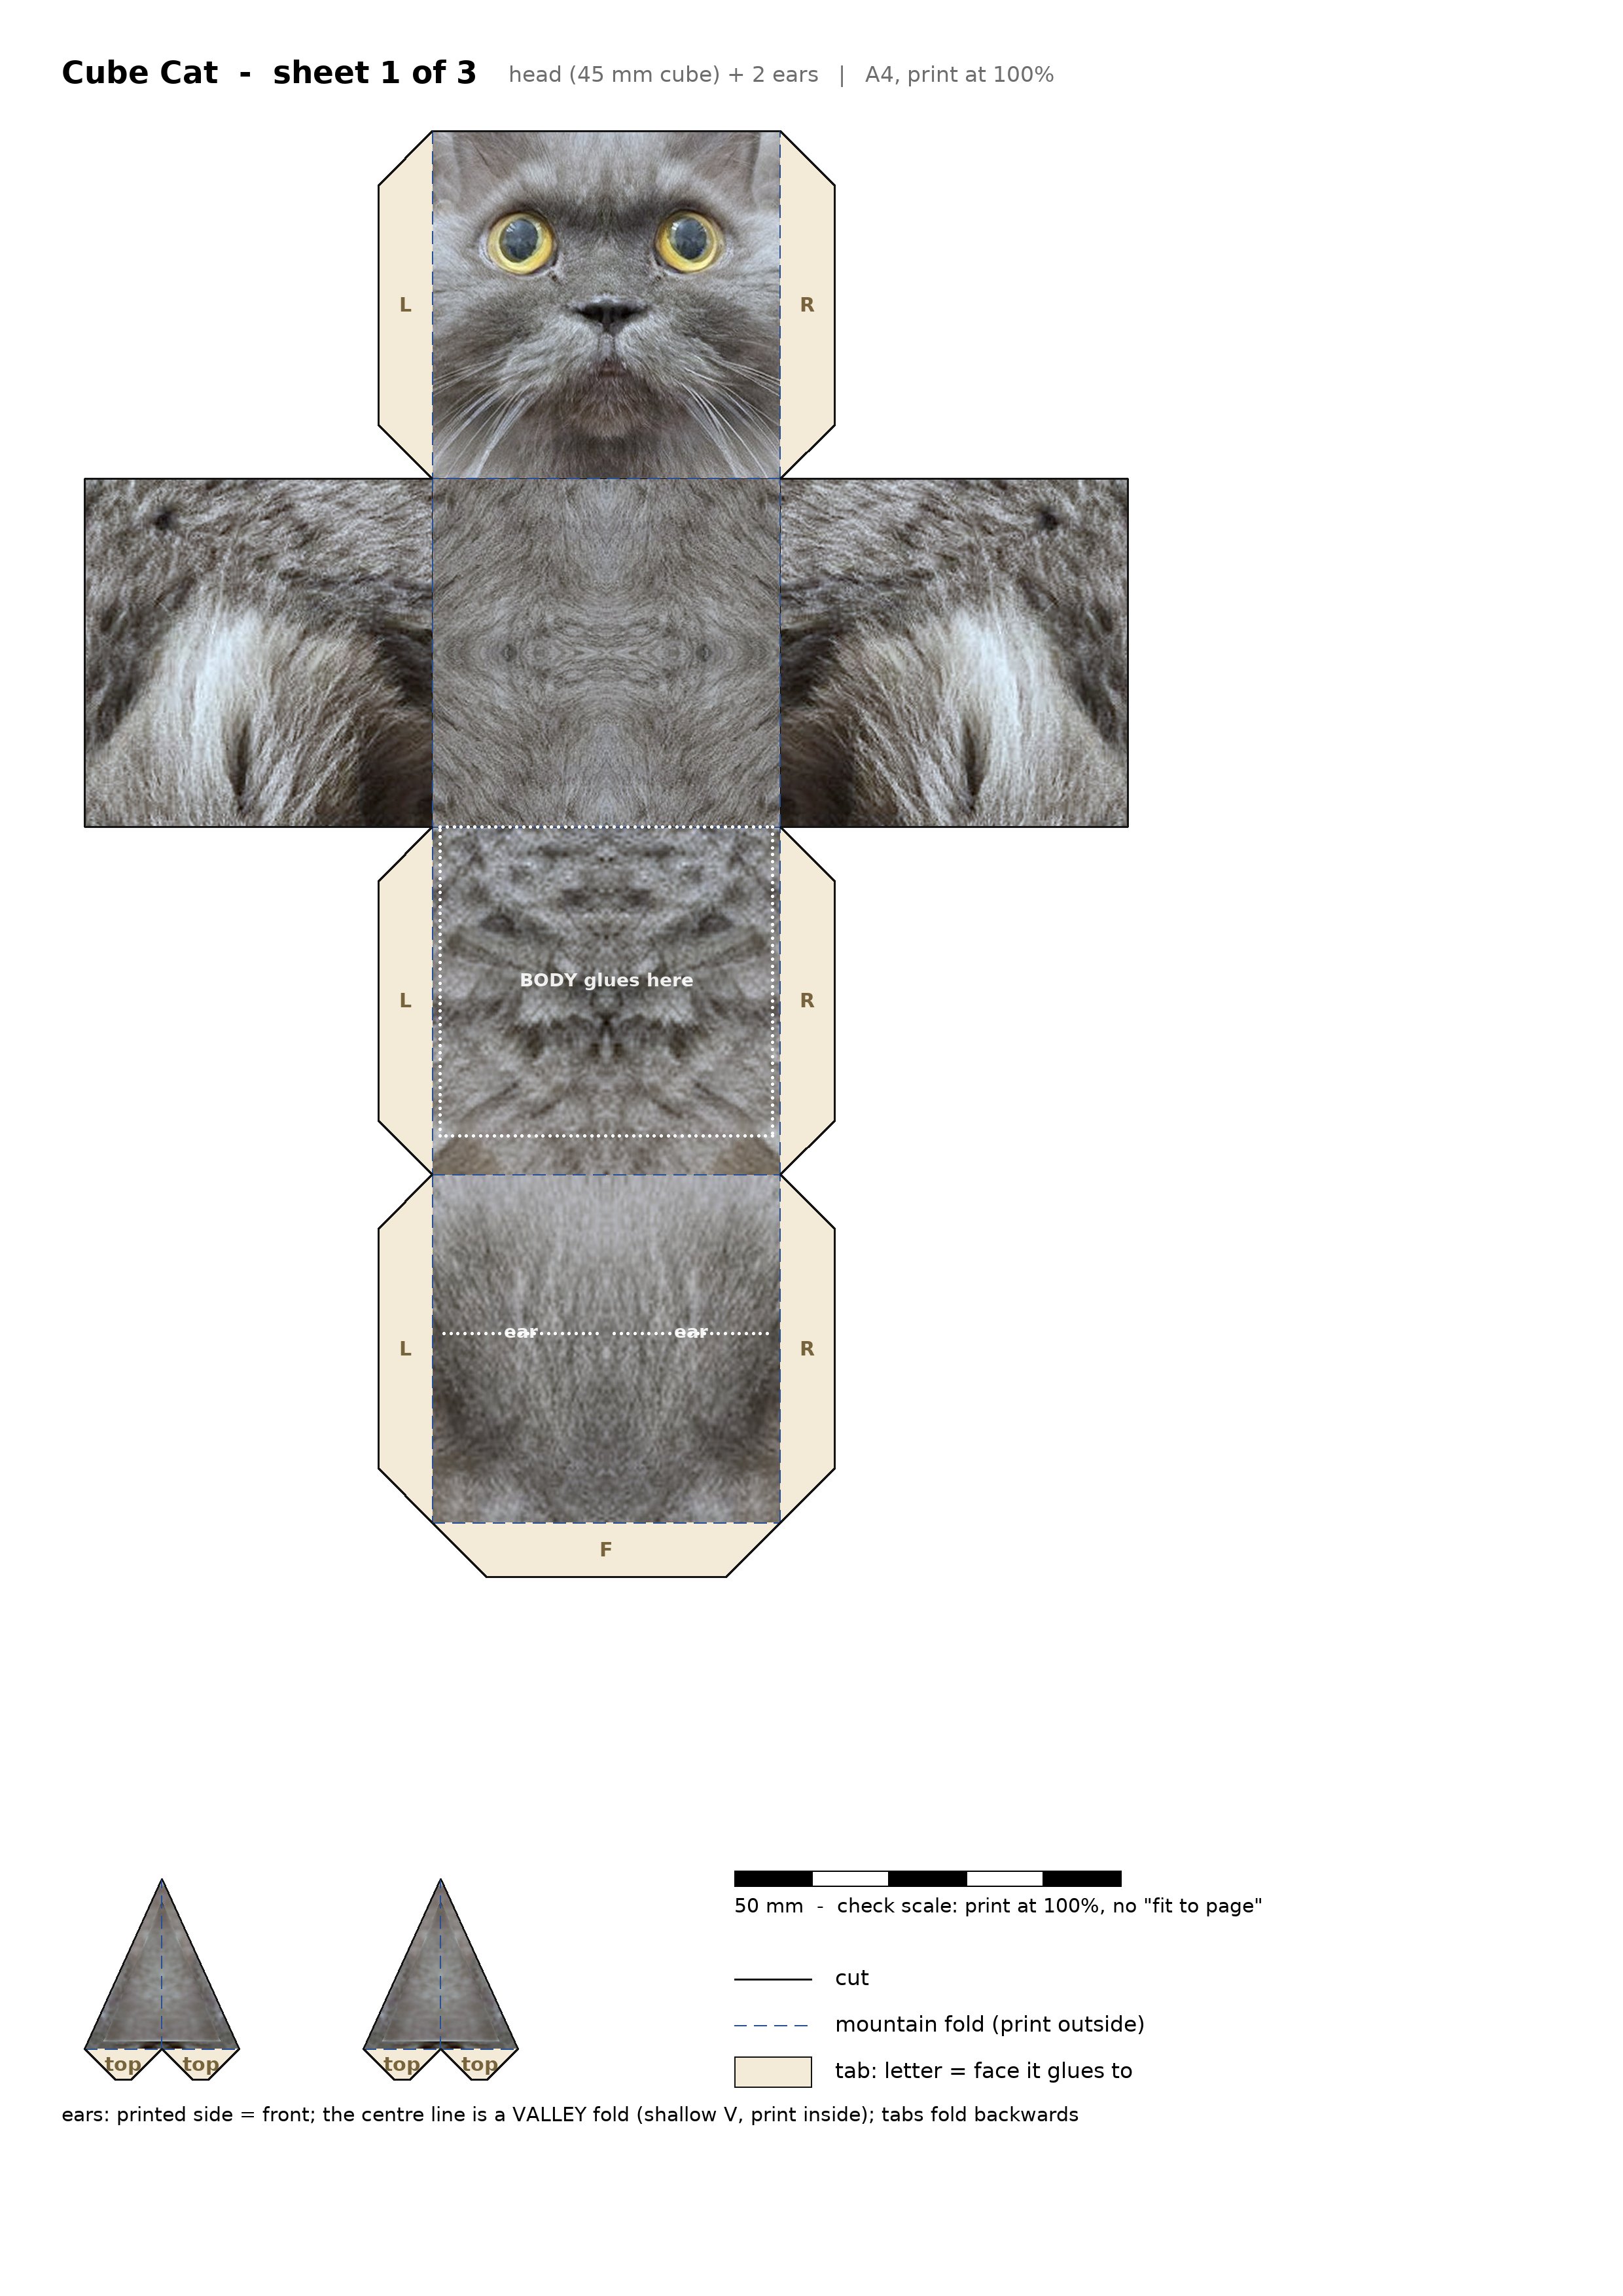
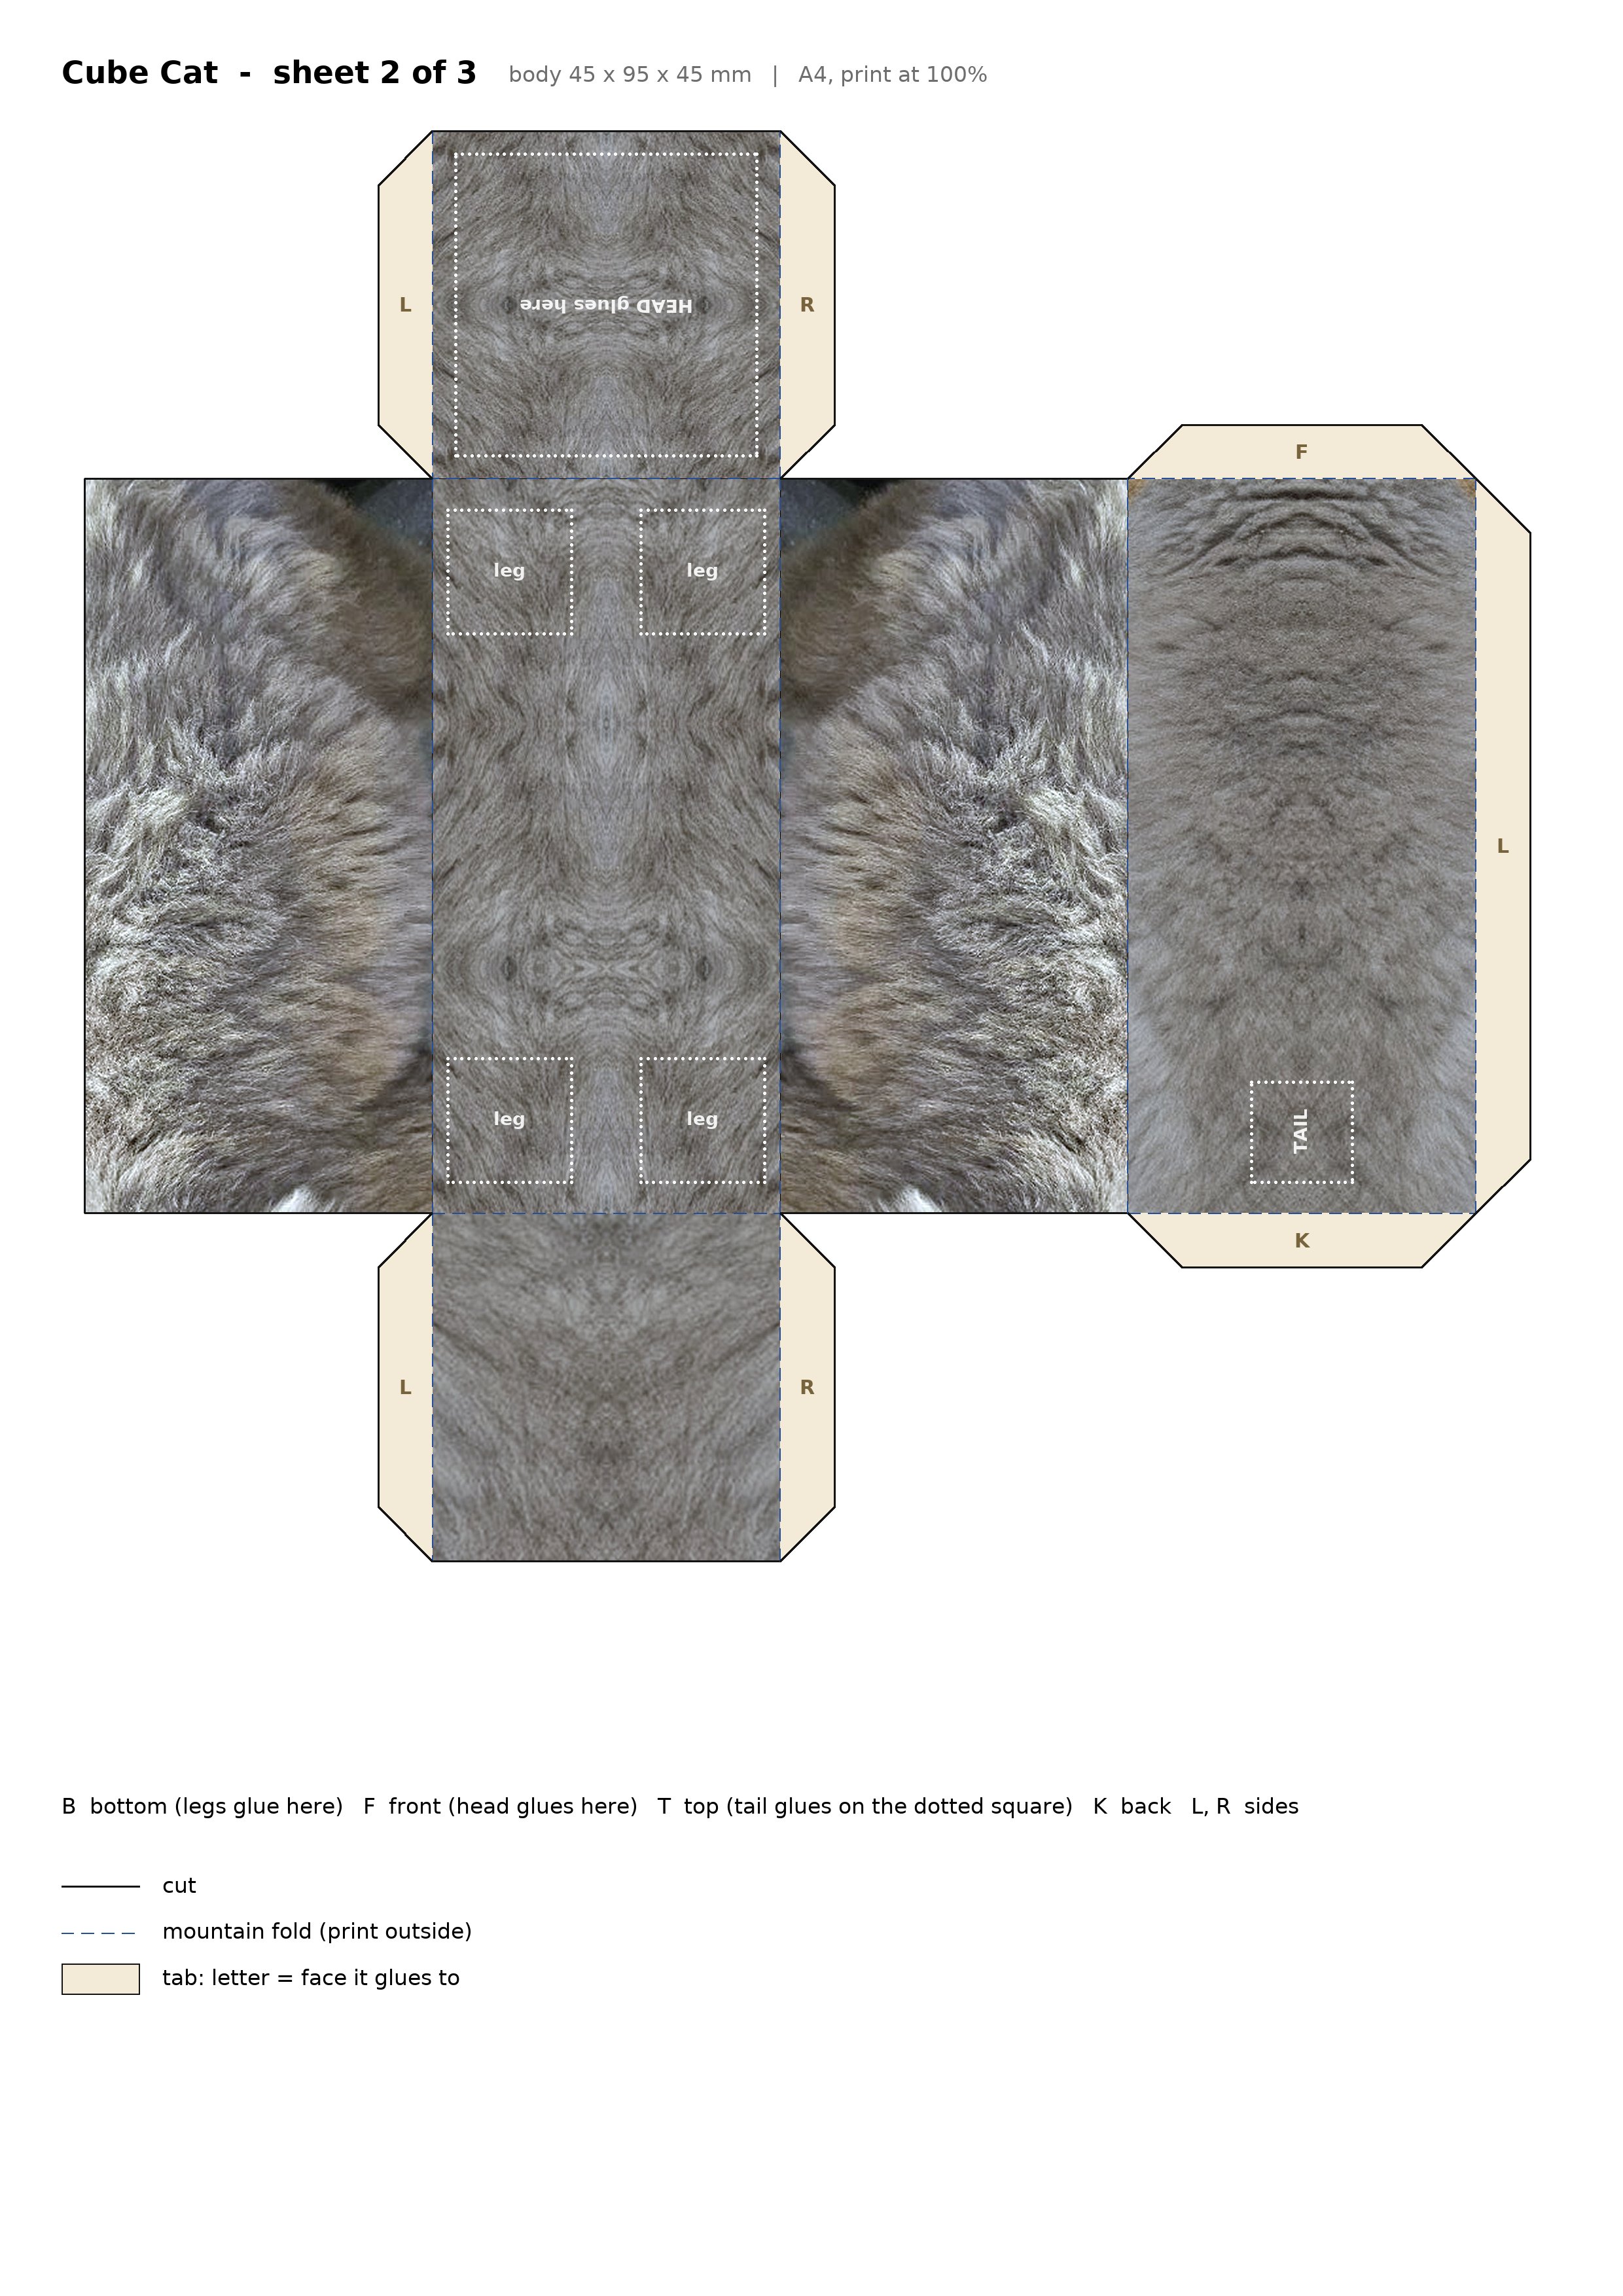
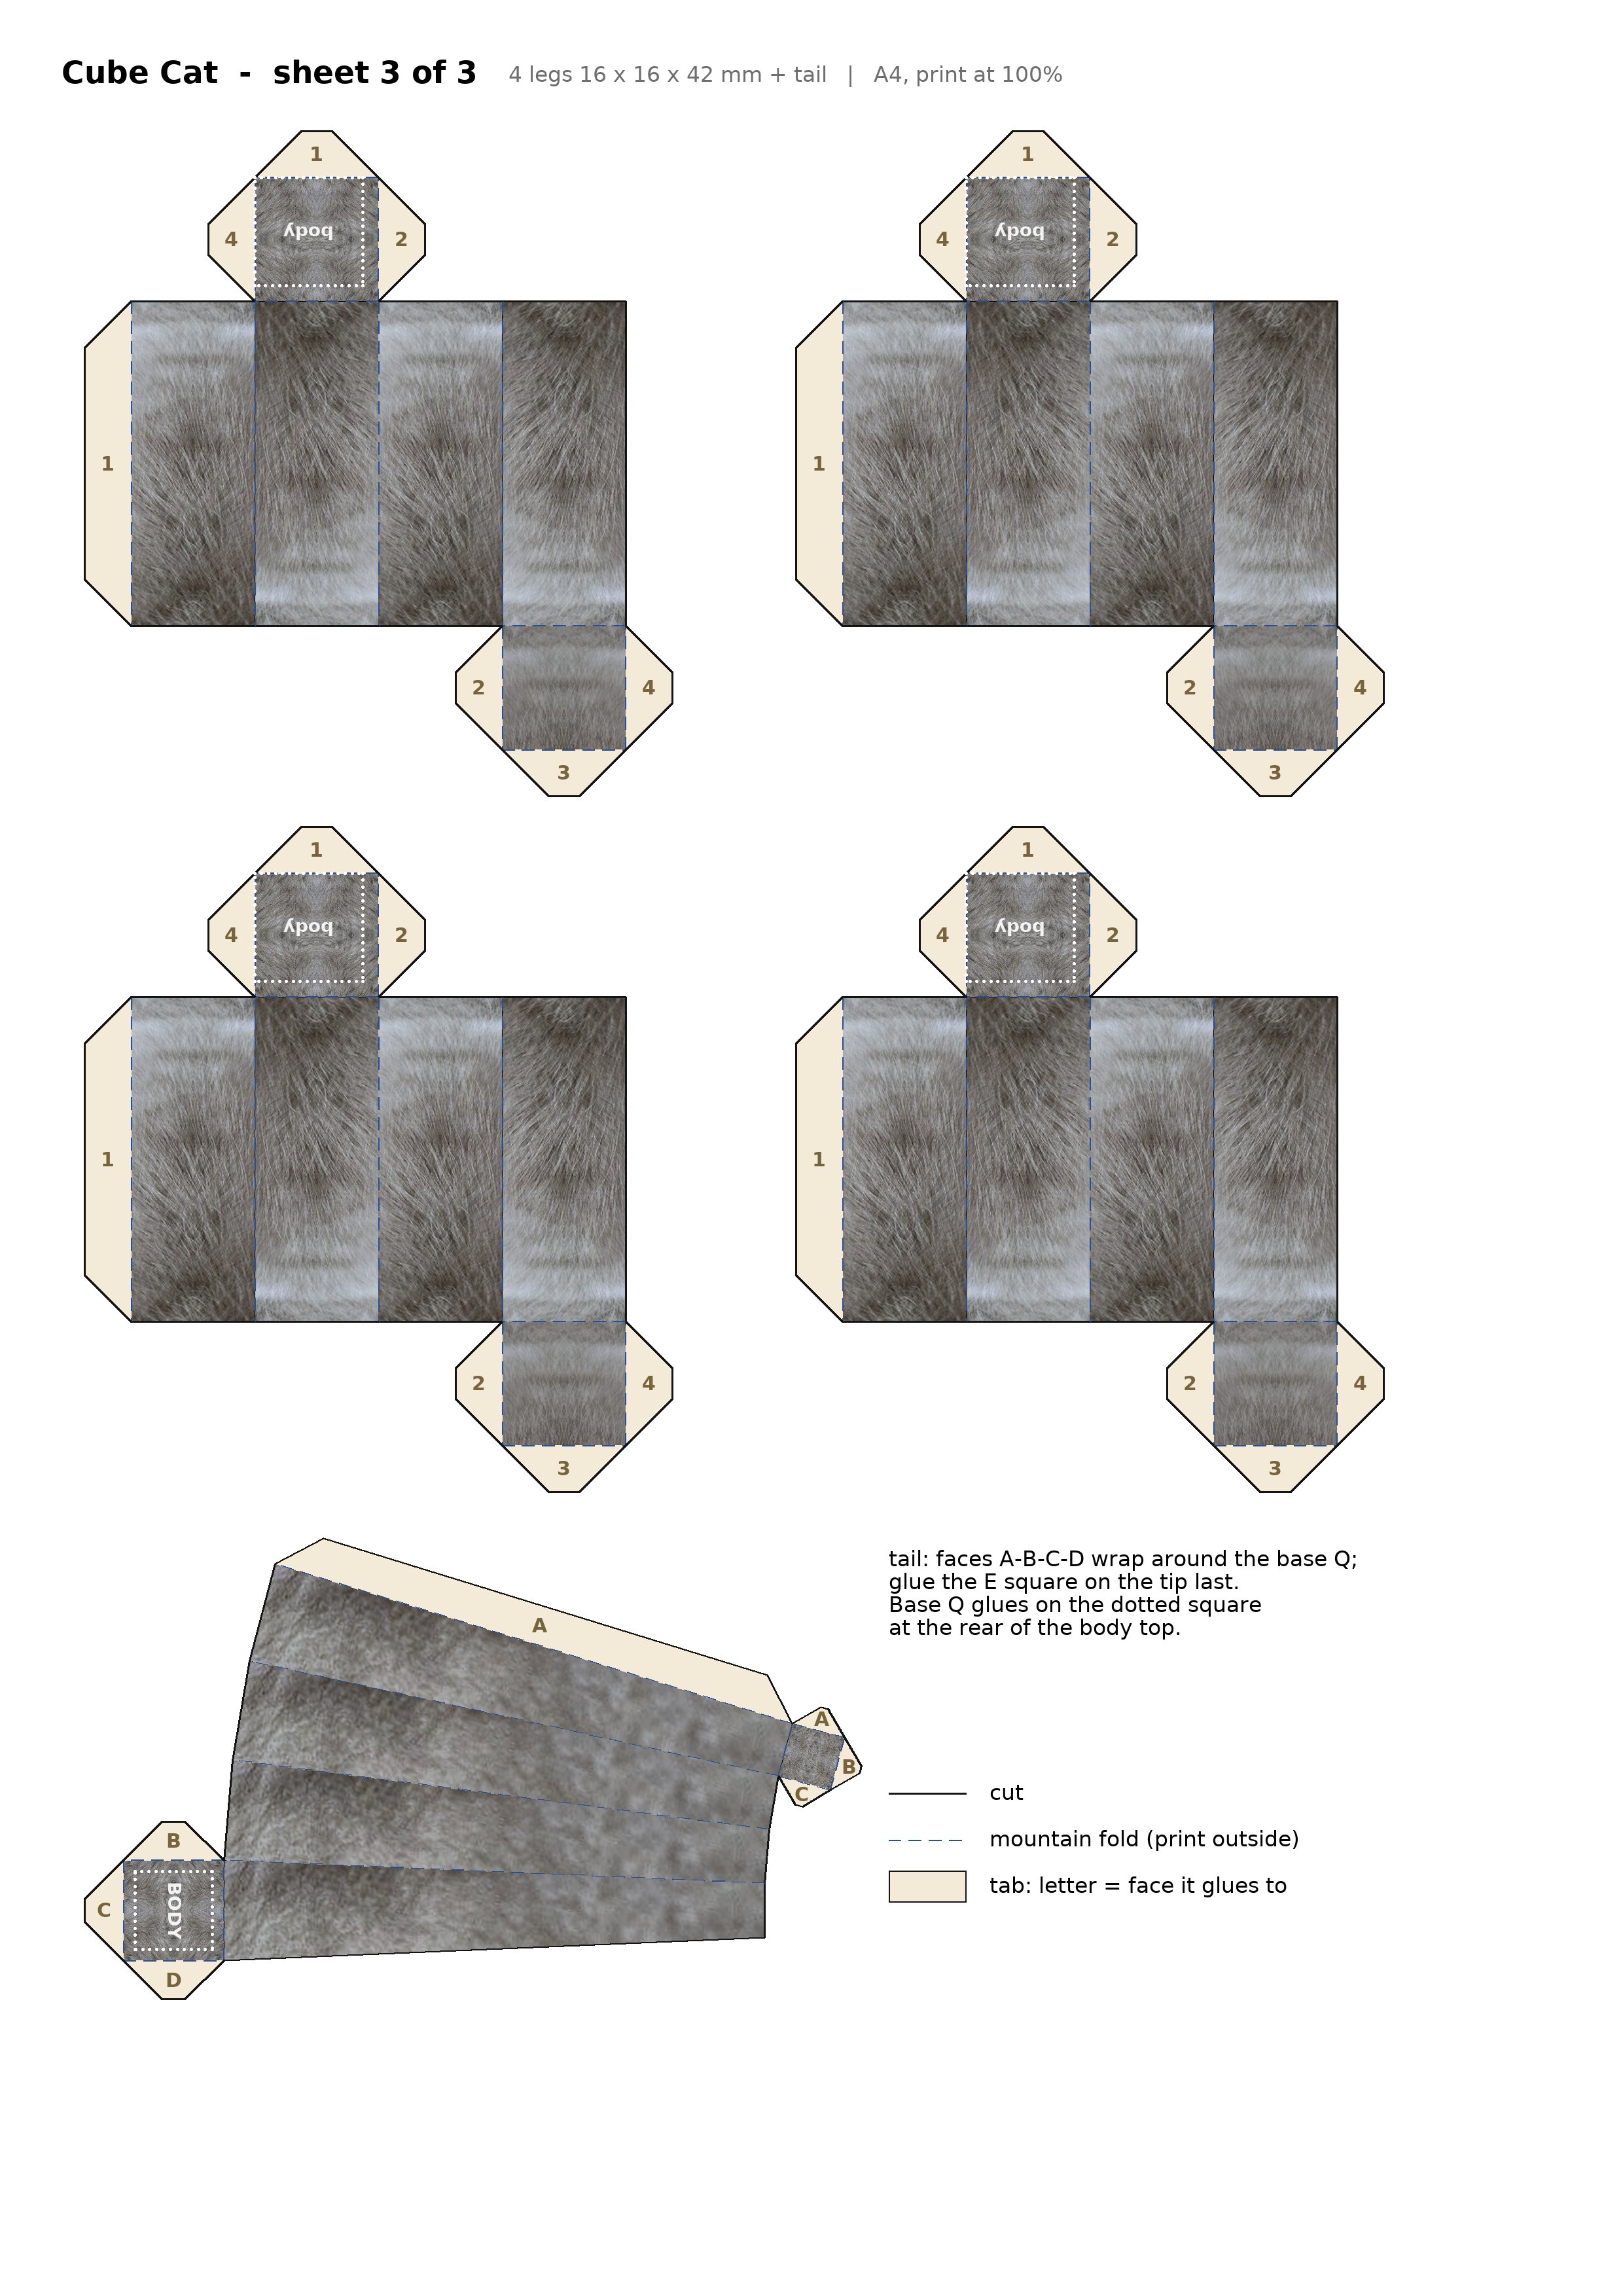
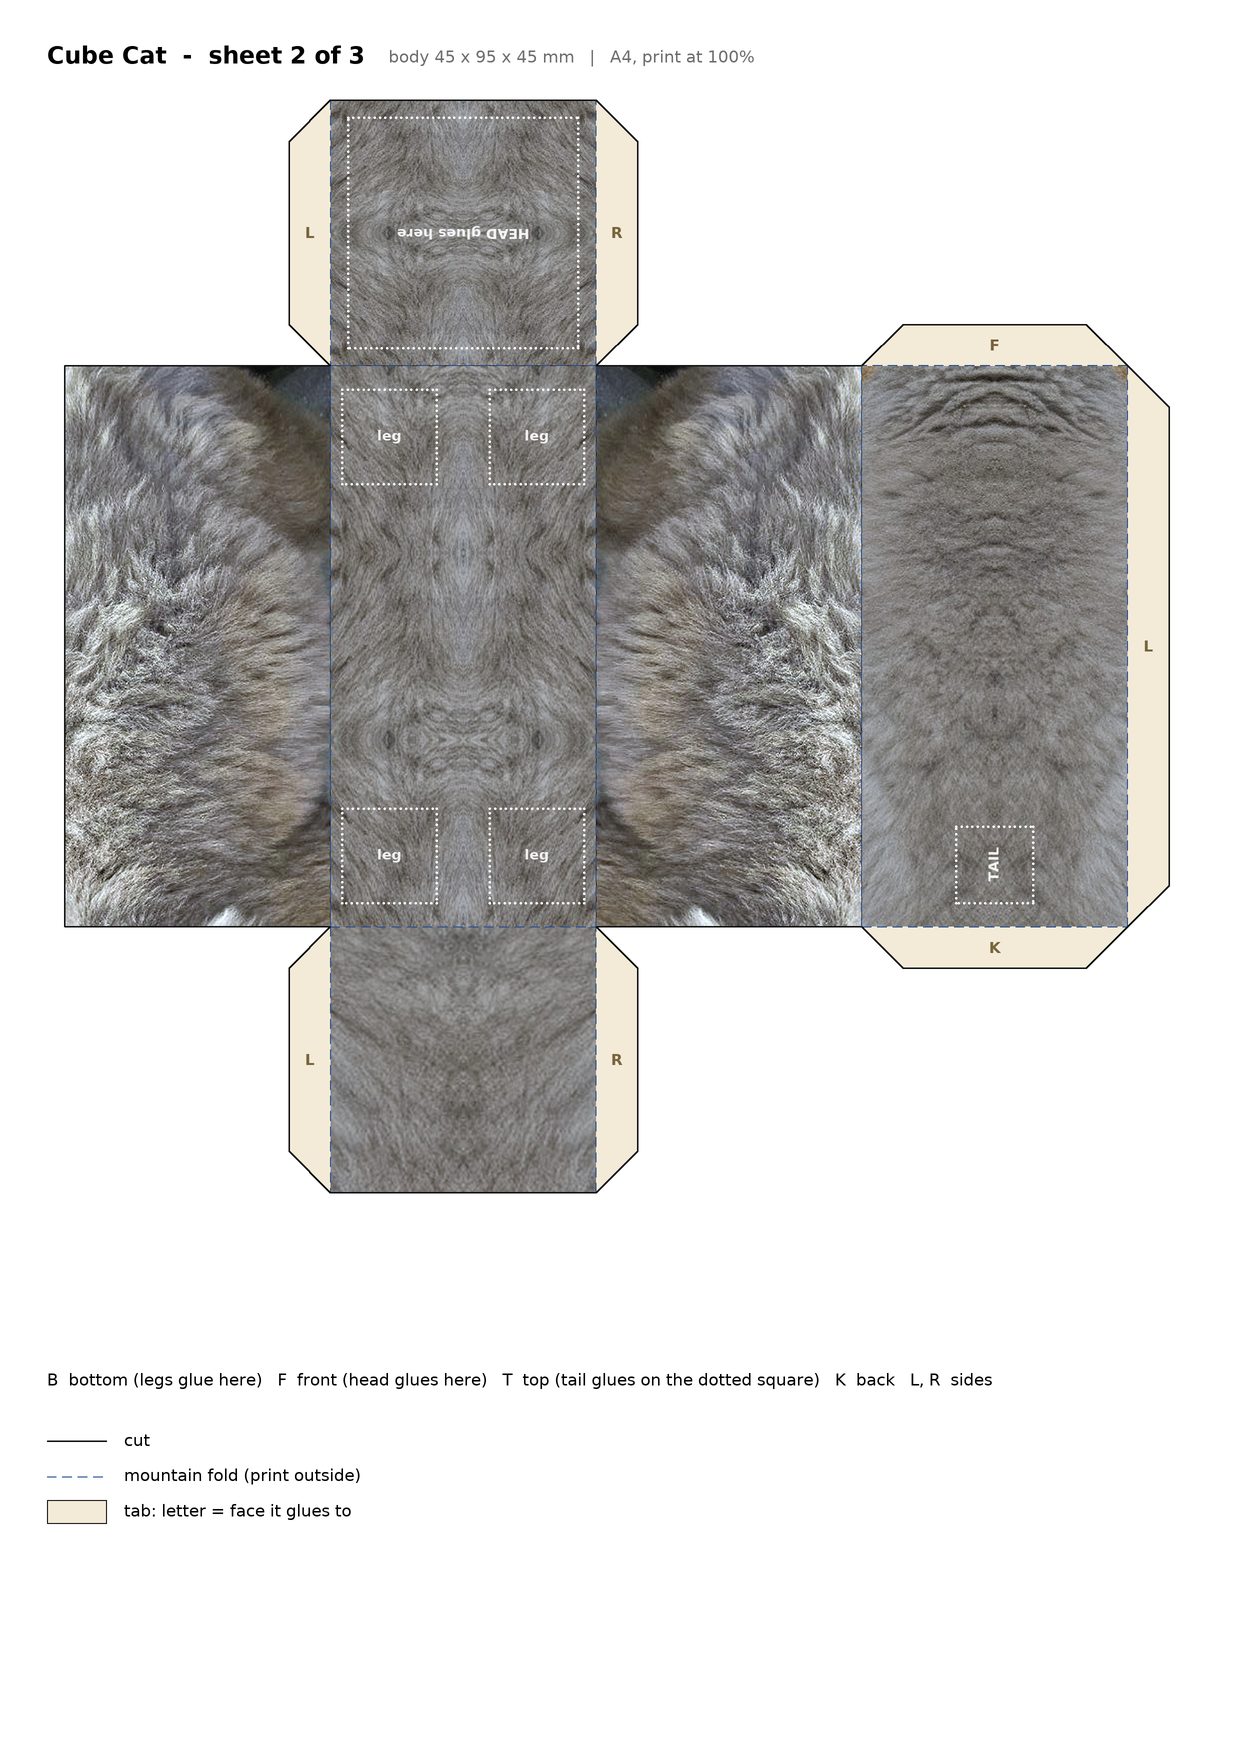
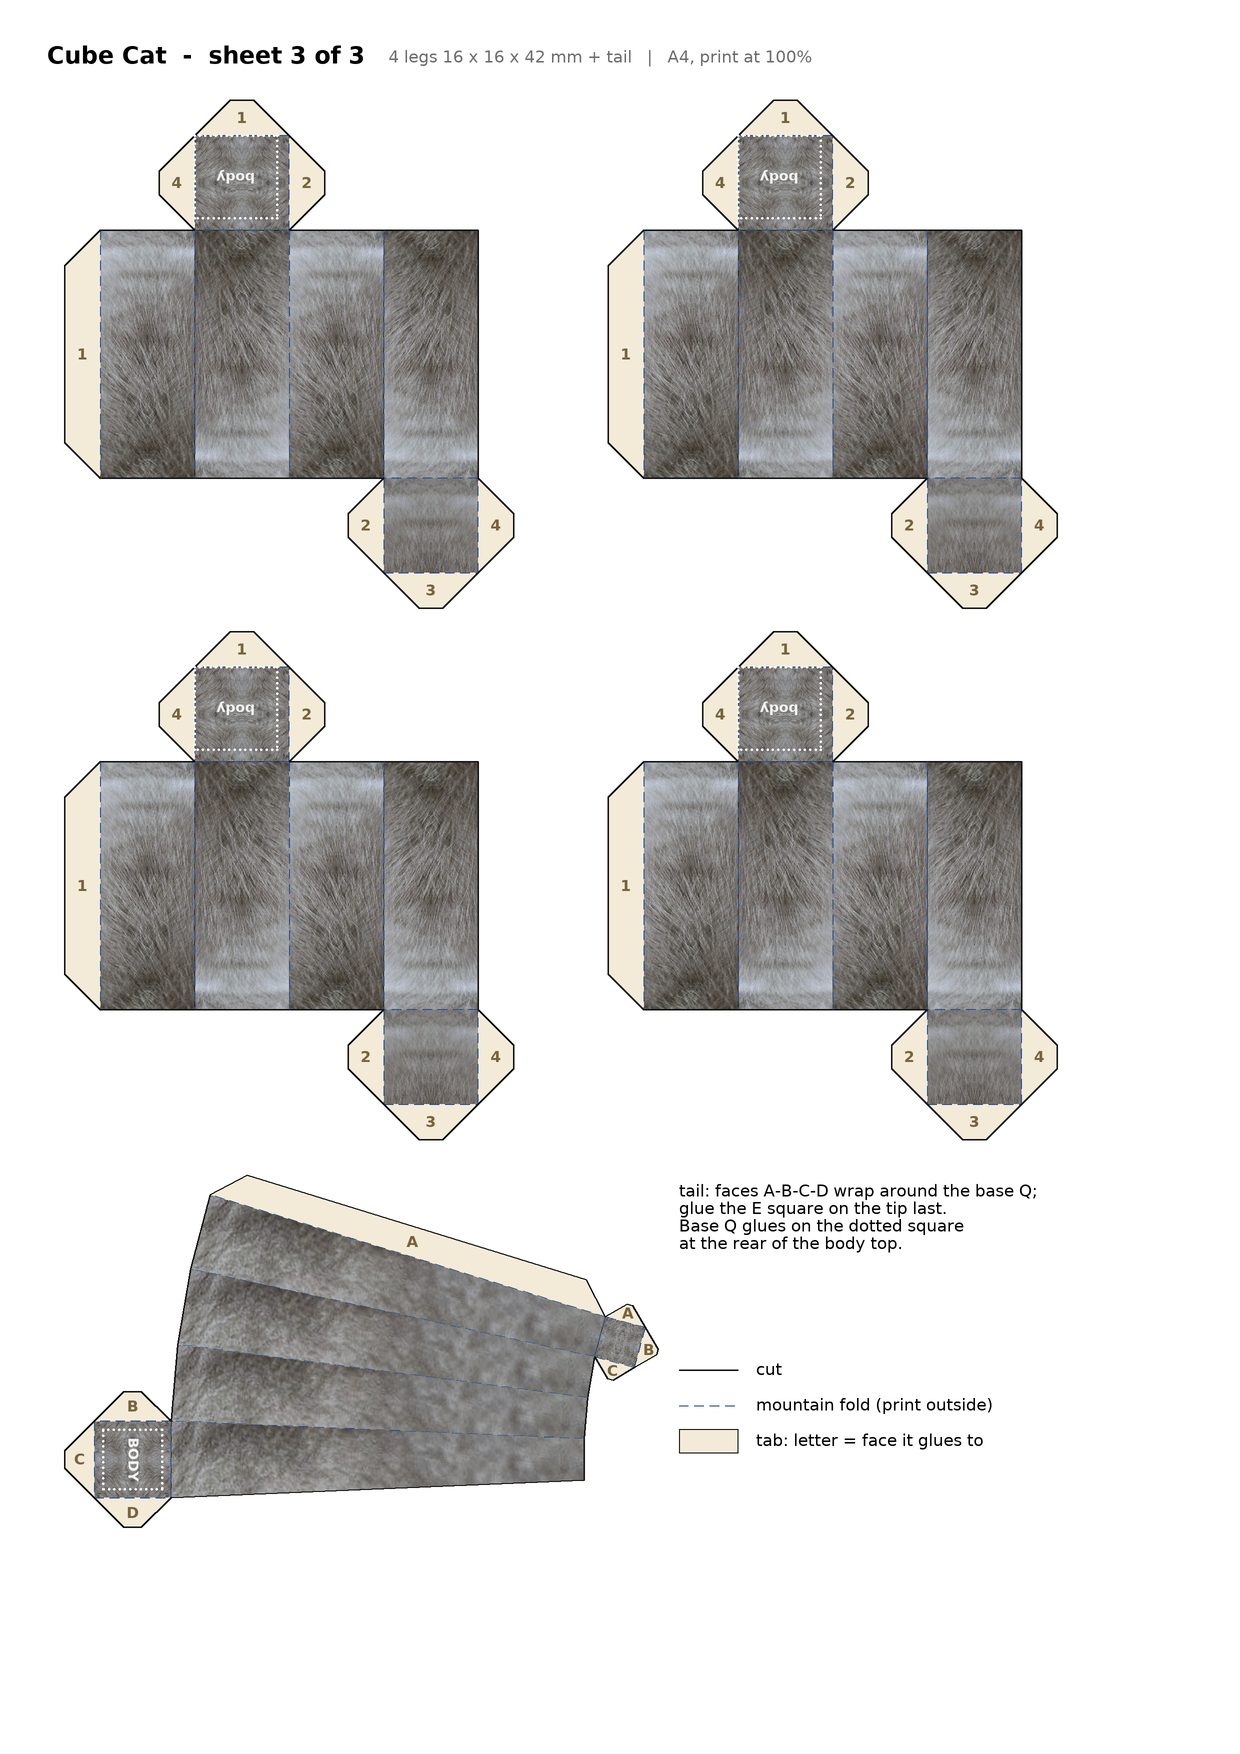
Every part is a true box net: all shared edges are equal, every seam has exactly one tab, and every part has a marked glue spot on the part it attaches to. Textures are perspective-mapped crops from the photos of your cat, colour-balanced to one neutral grey so the faces match across seams.
| Part | Shape | Size, mm | Faces | Tabs | Attaches to |
|---|
Order of work
- Cut every part along the solid lines. Score all dashed lines with a ruler and an empty ballpoint before folding; 200 to 250 g/m² paper folds cleanest.
- Head: fold the cross into a cube. Glue the two tabs of F to L and R, then the two tabs of K, then close with the three tabs of T. Every tab carries the letter of the face it glues under.
- Body: fold L and R up first, then F and K with their tabs, and close with T last. T carries the dotted tail square at the rear, B the four dotted leg squares, F the head area.
- Legs (×4): wrap faces 1-2-3-4 around the paw square P, glue the long tab of 4 under 1, fold the three P tabs inside, then close the top T.
- Tail: wrap A-B-C-D around the base square Q, glue the slanted tab of D under A, then cap the tip with E. The tail tapers from 13 to 7 mm.
- Ears (×2): the centre line is a valley fold, printed side inside, to a shallow V. Fold both base tabs backwards.
- Only now bring the parts together. Glue the four leg tops onto the dotted squares under the body. Glue the head's back face K onto the body's front F, bottom edges 5 mm apart so the head sits slightly higher and 5 mm above the back. Glue the tail's base square Q onto the dotted square at the rear of the top T, tail pointing up. Glue the ear tabs onto the two dotted lines on the head's top.
Sheets
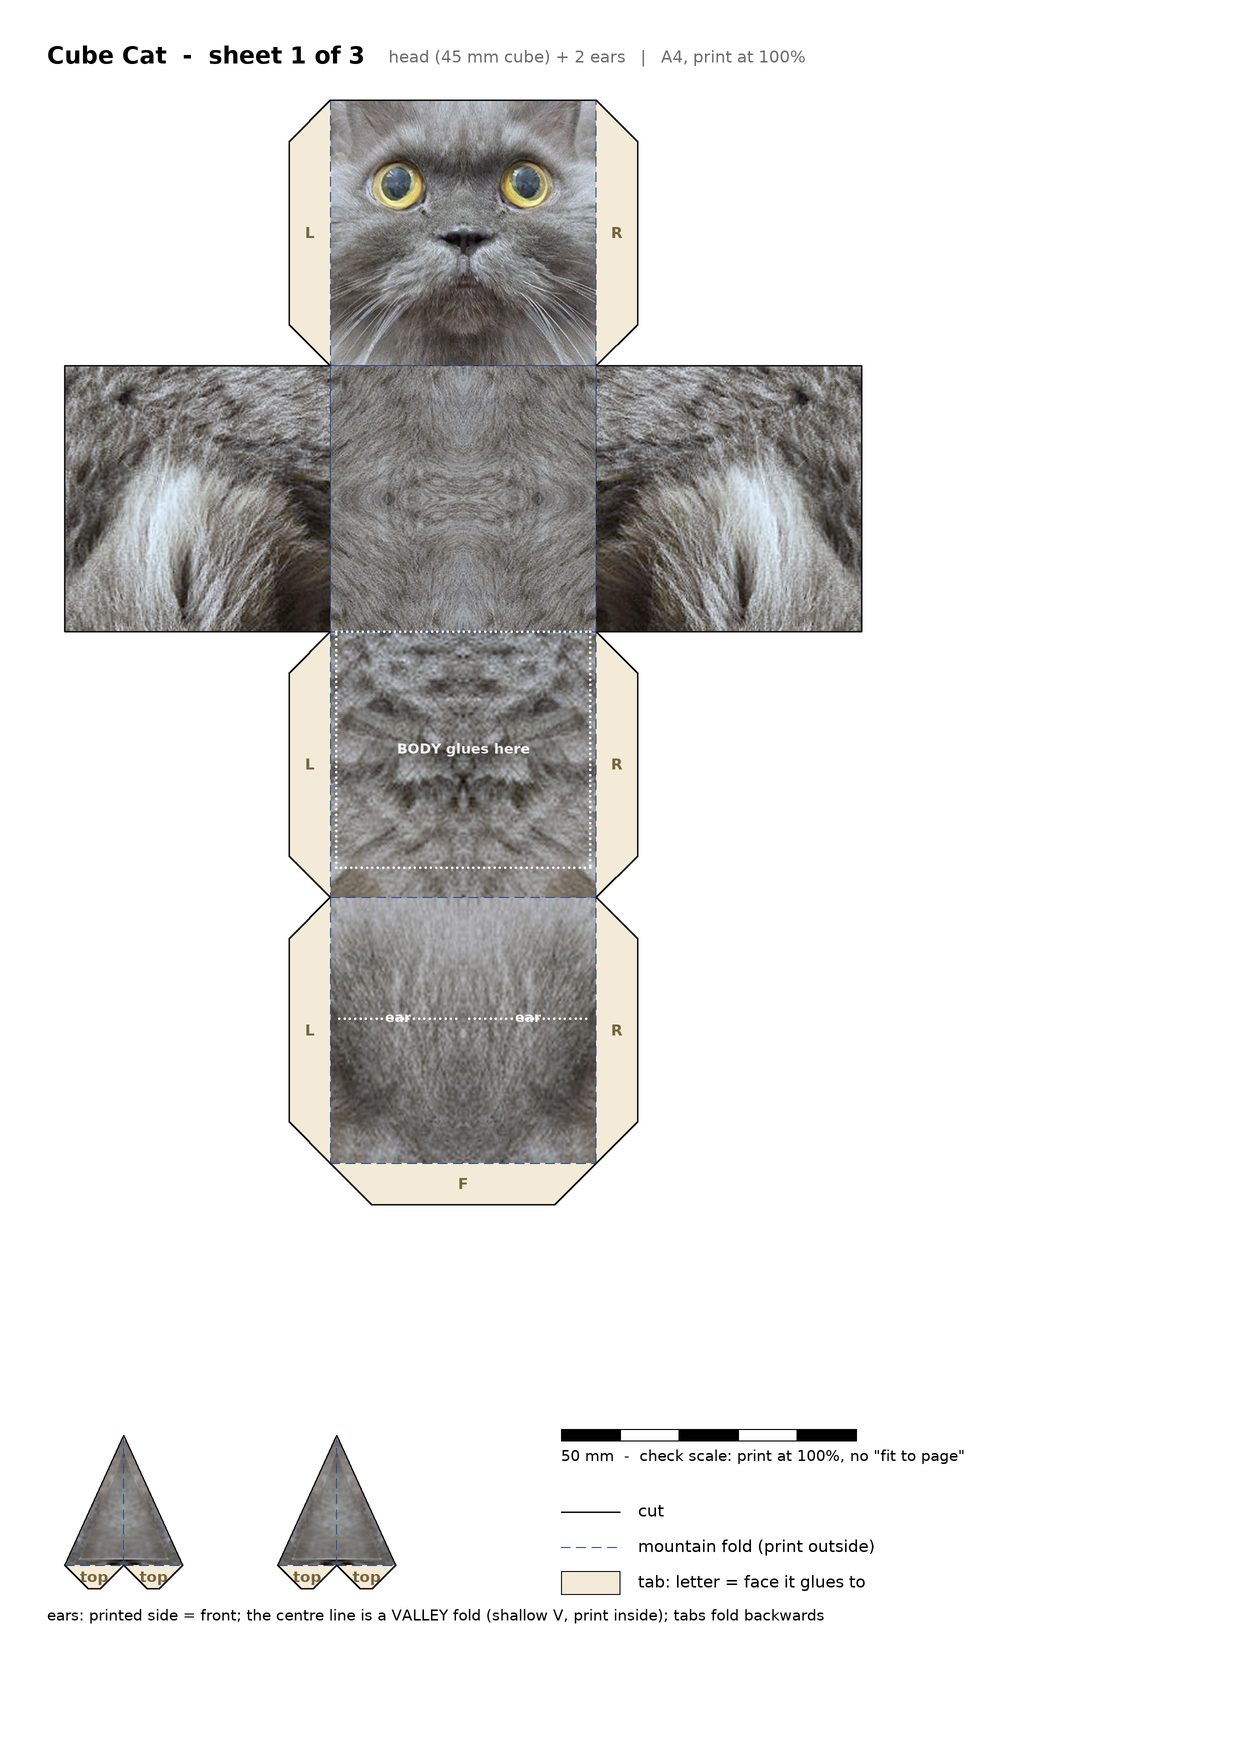
Three A4 pages. Use the PDF for printing (exact 300 dpi), or print this page directly with Ctrl+P: only the sheets are printed, margins 0, scale 100 %.